4. Django Administration Interface
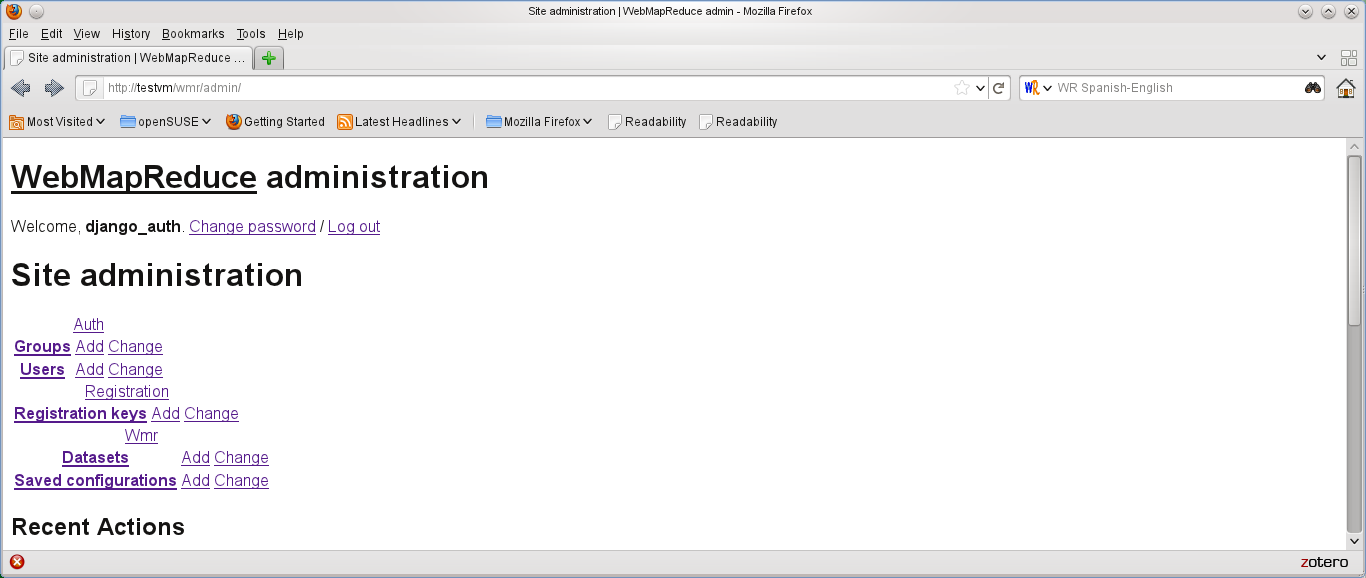
There is an administration interface located at the /admin sub-url of the WebMapReduce site (e.g., if you put the site at /wmr, it will be found at /wmr/admin). You can log into the site using the username and password that you provided when you ran python manage.py syncdb. Once you do so, you will see a screen like below. All of the sections below assume that you are starting from that screen.

Administration Site Home Page
4.1. Changing a User’s Password
To change a user’s password, click the Change link to the right of the Users link. This will present you with a search bar to search for the user whose password you wish to change. Do so, then scroll down to the link with the user’s account name and click it. On that new page, you will see a paragraph that says
Raw passwords are not stored, so there is no way to see this user’s password, but you can change the password using this form.
Click the words “this form” to change the password for that user.
4.2. Adding a User
First, if you have many users to add, you probably want to enable users to register their own accounts as described in Enabling Users to Register Their Own Accounts.
To add a user, click the Add link next to the Users link. This will lead you to a page with a field for a username and two fields for the password (for confirmation). After entering those, press the Save button at the bottom of the page. This will take you to another page for configuring the user’s properties. If you know the user’s e-mail address, you should enter it in the E-mail address field. You may also enter the user’s first and last name in those fields. Otherwise, leave the other fields on this page as they are and press the Save button at the bottom of the page.
4.3. Enabling Users to Register Their Own Accounts
By default, to enable users to register their own accounts, you must set up a time-limited registration key which they enter at registration. To disable this, see the discussion of REGISTRATION_ENABLED and REQUIRE_REGISTRATION_KEY in _sect-Admin_Guide-Frontend_Installation-Interface_Settings.
To set up a registration key, click the Add link to the right of the Registration keys link on the Administration site home page. Here you enter the actual text key that the user enters in the Name field. The Expiration time for the key is by default set to 24 hours after you loaded this page. To change this, edit the Date field, in %Y-%m-%d format, and the Time field, in 24-hour format with seconds. Then, press the Save button under the form to save the key.
4.4. Adding a Named Dataset
To add a named dataset, click the Add link to the right of the Datasets link on the Administration site home page. This will take you to a form with the following fields: Dataset name, Cluster path, Owner, and a checkbox labelled Public. The dataset name is the name that the user will recognize this dataset by in a menu on the job configuration page. The cluster path is the path on the Hadoop Distributed File System (DFS) that the data you are putting in this dataset currently is at. Note that this interface will not upload data to the DFS: to do that, see the directions in Data Sets. You may either make this dataset visible to all users by selecting the Public checkbox or you may specify a single user who can view it using the Owner field. When you have entered all these fields, save the dataset with the Save button at the bottom of the form.