2. The Web Interface
2.1. Job Configuration
The web interface exposes these general configuration options:
- Job Name
- A brief name that signals the purpose of the job to the user and to cluster administrators. Also used to label saved configurations. May contain any printable character, and spaces.
- Source Code Language
- The programming language to use for the mapper and reducer. The available options are system- and configuration-dependent.
- Number of Map Tasks
- A suggested number of discrete “tasks” to divide map phase of the job into. More tasks allow data to be divided more equally, but can also add overhead. There is no guarantee that the suggestion will be followed, and it usually does not need to be set manually.
- Number of Reduce Tasks
A suggested number of tasks to divide the reduce phase of the job into. Like the number of map tasks, it does not need to be set manually. However, the map-reduce system follows this suggestion more closely than for map tasks. The default is 1. Set it higher for large jobs where the reduce phase becomes a bottleneck.
Note
For test jobs, neither the map or reduce phases are split into tasks, so these numbers are ignored.
- Sort Order
- Controls whether keys should be sorted numerically or alphabetically in the final output. In alphabetic sorting, a key of 10 would come before 9 because the first digit (1) has a lower value. With numeric sorting, the opposite would be true, because the entire numerical value is compared. Numeric sorting supports both integer and floating-point values, and sorts alphabetic characters before numbers.
2.2. Job Input
There are four different ways to provide input for a job:
- Cluster Dataset
- Specify a public dataset to use as job input. These datasets are site-dependent, and are usually managed by administrators.
- Cluster Path
- Specify a path to a preexisting file on the DFS that the WebMapReduce server is associated with. This option is usually used for large datasets.
- Upload
- Upload data from the local machine to use as job input. This option should be used for small- to medium-sized input.
- Direct Input
- Input text directly into the form to use as job input. This is the quickest and easiest way to provide small amounts of data for jobs, and is well-suited for test jobs.
When the Upload and Direct Input options are used, the data is uploaded to the DFS when the job is saved or submitted. The form is updated so that the job input is set to the path on the DFS to which the data was uploaded. The data can be reused through the Datasets interface in the navigation bar.
2.3. Mapper and Reducer Source Code
The mapper and reducer must be written in the language specified by the Source Code Language selection box, following the appropriate format for that language. (See later chapters for examples and API specifications for each language.) Each piece of code can be submitted in either of two ways:
- Upload
- Upload source code from the local machine to the web interface. This is useful for long source code listings.
- Direct Input
- Input code directly into the text box. Code submitted this way might be lost if you refresh the page, navigate away, etc., depending on your browser.
2.4. Managing Job Configurations
WebMapReduce allows users to save job configurations for future use. This is accomplished by clicking the Save button at the bottom of the form. Configurations are saved according to the job name, and saving a job with the same name as an existing configuration will overwrite that configuration. Saving a configuration also sends any uploaded or manually entered job input to the DFS—if the job configuration is reused, it will provide the path to this data. Job configurations may be reused through the Saved Configurations interface. To load a configuration:
- Select the Saved Configurations option from the navigation panel.
- Click New Job from the Actions category of the desired job.
2.5. Submitting and Monitoring a Job
Once a job has been properly configured, it can be submitted using the button(s) at the bottom of the interface. Jobs can be submitted in two ways: as test jobs, or as standard jobs.
Test Jobs
Test jobs do not run on a cluster or in any distributed context. Instead, they are executed immediately on the machine which hosts the WebMapReduce server, inside an environment that emulates the map-reduce process. This allows output to be delivered quickly, and also allows for more helpful error output. The purpose of test jobs is to provide an easy way for users to debug their programs without having to write a test framework of their own. In general, jobs should be tested in the test environment before being run full-scale in order to save time and resources.
Note that the output of test jobs is only saved temporarily, and additionally there is a limit on the size of input that may be used with test jobs. Since this limit is configurable, questions concerning test job input size should be directed to local system administrators. If the WebMapReduce backend is restarted, test jobs will automatically expire and become inaccessible from the web interface.
Standard Jobs
Standard jobs are “real” map-reduce jobs that are run in a distributed context, most commonly a Beowulf cluster. These jobs have no limits on input size, can save and reuse output, and support monitoring.
Once a job of this type is successfully submitted, users are redirected to the monitoring page, which automatically refreshes to update the job status. Additionally, users can cancel their own jobs from this interface. If the job completes without error, its output will be displayed on the next refresh (across multiple pages if necessary) and options will be provided to re-use the output as the input of another job, and to reload the job configuration for a new job. Currently, WebMapReduce does not allow users to download their job output through the web interface, but it can be accessed directly through the DFS if necessary.
If one user has submitted too many jobs in the last period of time, he or she will receive an error asking them to wait a few minutes before submitting another job.
2.5.1. Job History
All submitted jobs are recorded in the Job History interface. This feature allows users to revisit past jobs, sorted by submission time, to view their monitoring page. A previous job may be accessed by:
- Selecting the Job History option from the navigation panel.
- Selecting the Job Name of the desired job.
Note that test jobs are displayed in italics, and may expire and become inaccessible.
2.6. Example Job
This example will walk through the process of using WebMapReduce, from signing in to monitoring a job. We will demonstrate WordCount (the simple map-reduce application described in Example: WordCount) using Python 3. For WordCount examples in other languages, please see the documentation for each language in later chapters.
2.6.1. Log In
To begin using WMR, you must first sign in. Navigate to the WMR main page and login using the form provided.
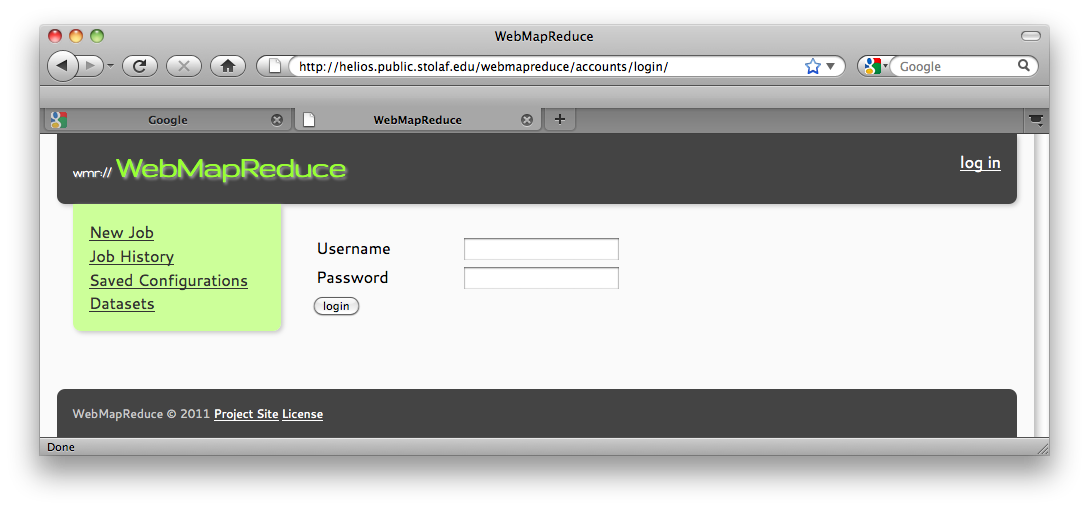
Login Form
2.6.2. Configure & Write Job
Once logged in, you need to configure your job’s basic settings. Use any job name and select Python 3 for the source language. There is no need to set the number of map or reduce tasks in this example, so leave these fields unchanged.
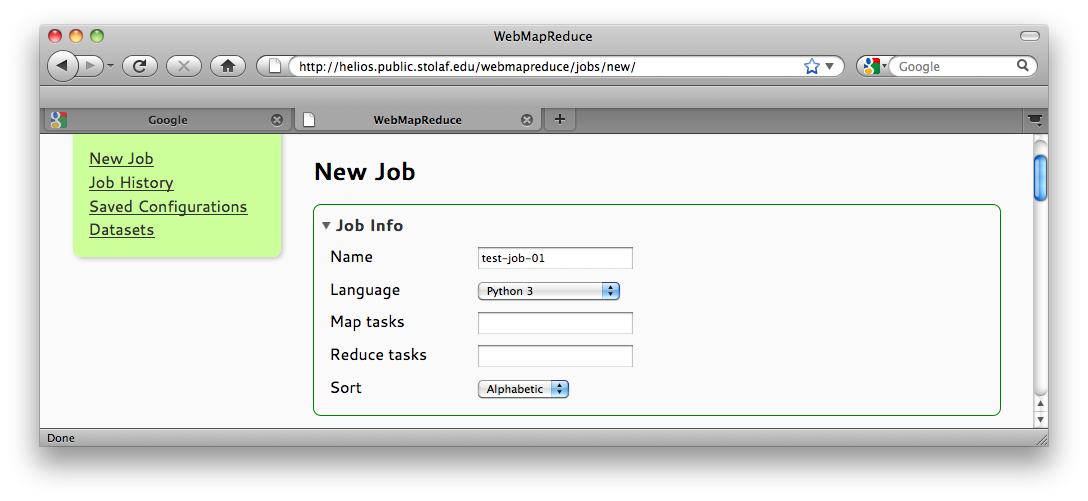
Job Configuration
Next supply input to the job. A small amount of text will suffice for this example. This has the benefit of allowing us to check whether we received the right results at a glance. This same example could, however, be run on a much larger dataset (try it out when you are finished!). Use something simple, preferably with repeated words, like the text shown in the screenshot in Job Input:
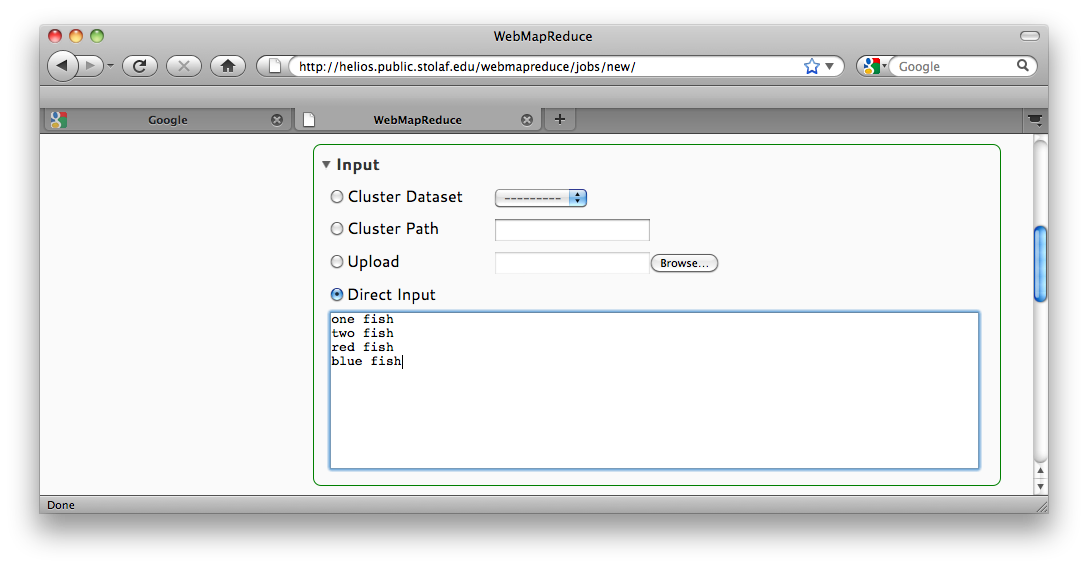
Job Input
Now define a mapper. The following mapper does exactly what is described in Example: WordCount in the introduction to map-reduce: it takes an entire line of input as its key (ignoring the empty value), and outputs every word in the line along with a 1 as the value:
def mapper(key, val):
  for word in key.split():
    Wmr.emit(word, '1')
Notice the following parts of the code:
- The function is named mapper(). This name is required so that WebMapReduce knows what function to call to feed input. [1] You are free to write other auxillary functions to support your mapper.
- The function takes two arguments named key and value. This is the input key-value pair described in the introduction to map-reduce. Both arguments will be strings. In this case, since the input we gave was simple text with no tabs to separate keys from values, the entire line will be contained in the key, and the value will be empty. [2]
- The Wmr.emit() function is how key-value pairs are output in the Python library for WebMapReduce. It takes two arguments: again, a key and a value. [3]
- Even though the value we output is a number, we have put it inside a string. This is to highlight that WebMapReduce always uses strings for keys and values. Technically, we could have just used the number 1. The Python library for WebMapReduce will automatically convert any type of arugment to a string using Python’s str() function. When it is fed to the reducer, though, it will not automatically be converted back. [2]
If the mapper receives the line “one fish” as input, its output should be:
one    1
fish   1
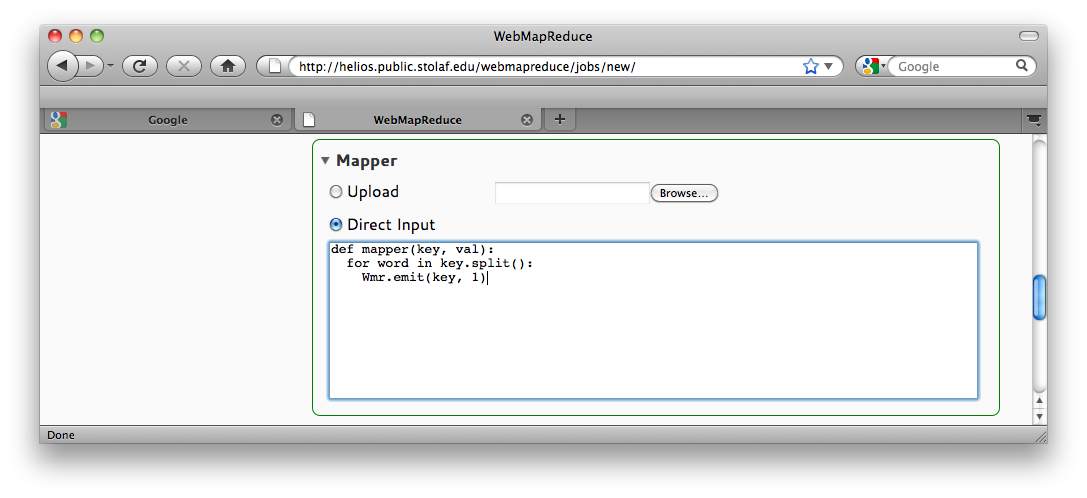
Mapper Source Code
Finally, we will write a reducer. This reducer adds all the 1‘s associated with each word to get a final count:
def reducer(key, vals):
  sum = 0
  for val in vals:
    sum += int(val)
  Wmr.emit(key, str(sum))
Notice the following:
- The function is named reducer(). As with mapper(), this is required.
- This time, the second argument to reducer() is actually a list of values. This is the list of all values output from the map phase whose key was equal to key. As described in the introduction to map-reduce, the framework collects these values and generates the list automatically. In this case, values is a list of "1"``s with as many elements as there were occurrences of ``key in the input.
- Before being added to sum, each value is converted from a string to an integer using Python’s int() function.
- Before being output with Wmr.emit(), the sum is converted from an integer to a string using Python’s str() function. As with the mapper, this is not required, but is included to make the conversion explicit.
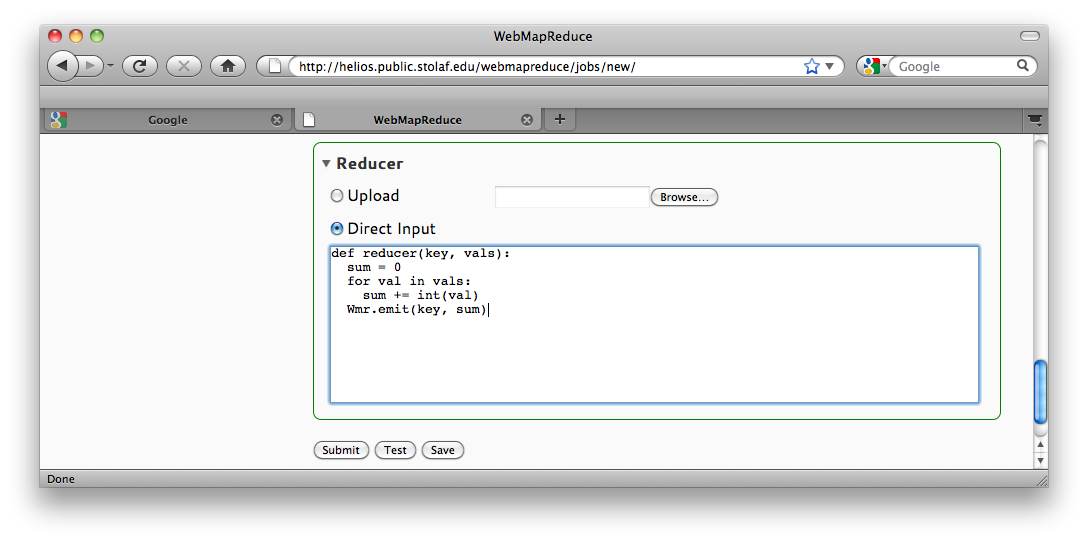
Reducer Source Code
Footnotes
| [1] | All languages require certain names for mappers and reducers, although the exact name may differ. The chapter on each language will give the specific requirement. |
| [2] | (1, 2) Although this is generally true in WebMapReduce, some languages may behave differently. These differences will be noted in the chapter for each language. |
| [3] | Other languages may have similar functions, or they may use the return value of the function as output. See the chapter on each language. |
2.6.3. Submit as a Test Job
Now we can submit the job. We will make sure our job is written correctly by submitting it as a test job, clicking Test.
The result screen for test jobs appears immediately, and results appear as soon as the test is completed. Test jobs have a much faster turnaround than a distributed job, and you can see any error output (if available) in addition to the regular output of your jobs. This makes test jobs a helpful tool for debugging map-reduce programs. As seen below, the test job run for the example succeeded, and the output is correct:
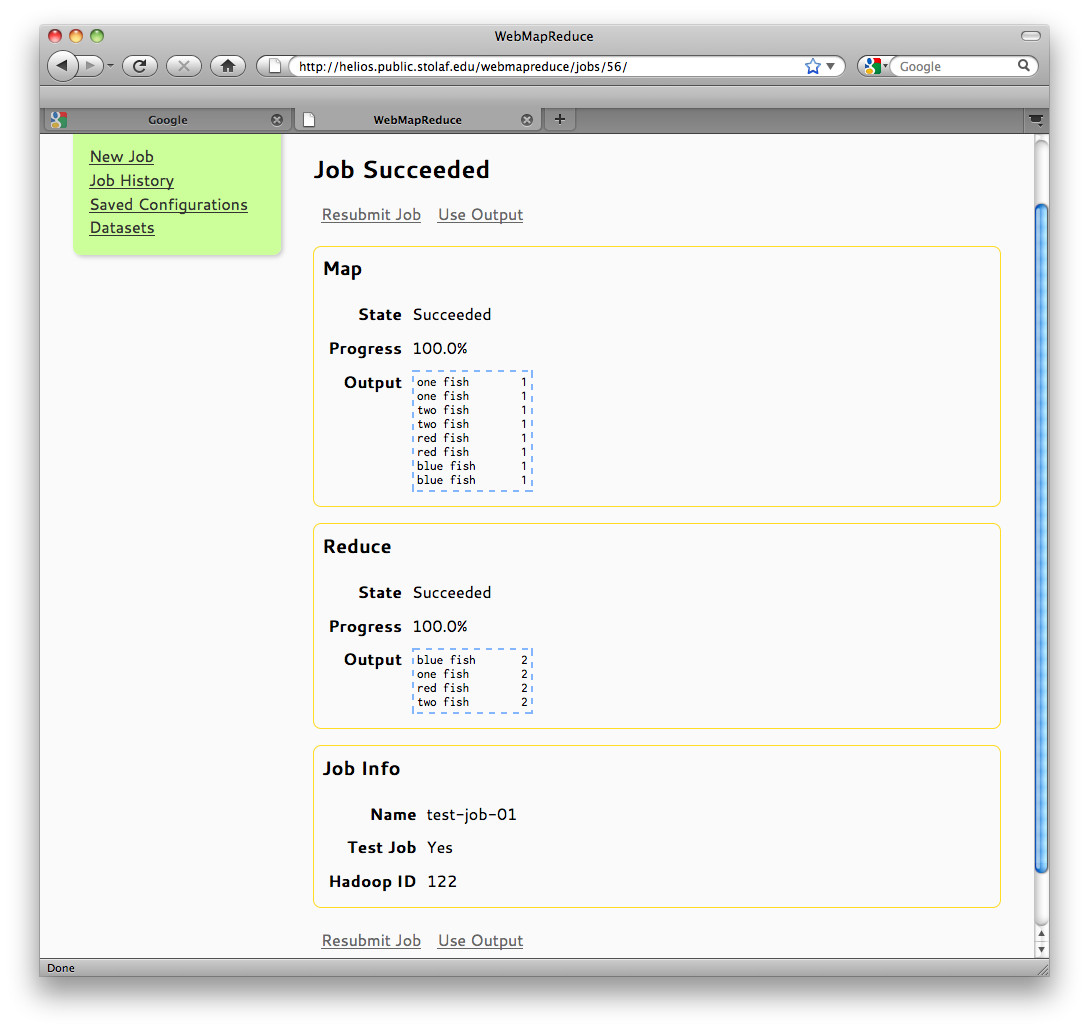
Test Job Output Screen
Under Mapper, we see each key-value pair that was output from our mapper (keys separated from values by tabs), and under Reducer, we see the final, sorted result of our job.
2.6.4. Submit as a Standard Job
Once jobs have been tested, they can be run on the cluster where there is a much greater amount of computing power and no limit on input. Click Resubmit Job link to reload the job form. Notice that the input has been changed to a Cluster Path. This is because when jobs are submitted (or saved) any external input is uploaded to the DFS. WebMapReduce automatically handles locating and using this data when reusing configurations.
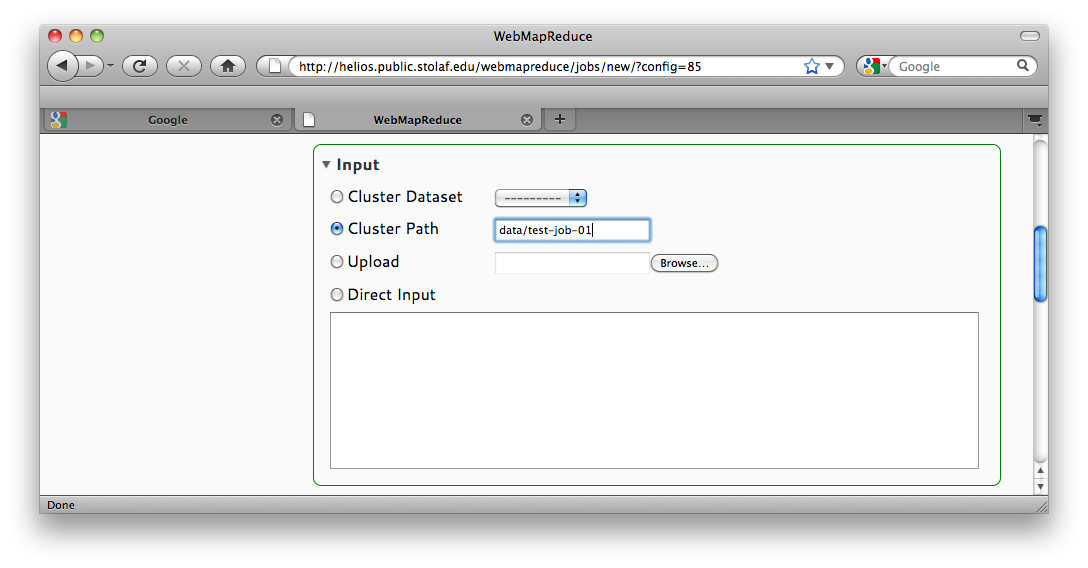
Automatically Handled Input
To submit the job as a cluster job, click the Submit button at the bottom of the form.
If the job is submitted without errors, you will be redirected to the monitoring page. This page provides progress information about the running job and automatically refreshes to update the information. Additionally, you can cancel the job by clicking Kill Job if it is taking too long, not working properly, stuck in an infinite loop, etc.
Important
Before you decide to kill a job, be patient! Sometimes, running a job on a full-blown cluster can take significant set-up time. Also, other users may be running their own jobs which have higher priority than yours, causing your job to be queued until more resources are available.
However, if you see that your job progresses for a while and stops for a significant amount of time—or sometimes, goes backwads and tries again many times—your program may be stuck in an infinite loop. Kill the job, go back, and try to debug it using test jobs or other tools. If that doesn’t help, there may be a problem with the cluster. Contact your administrator.
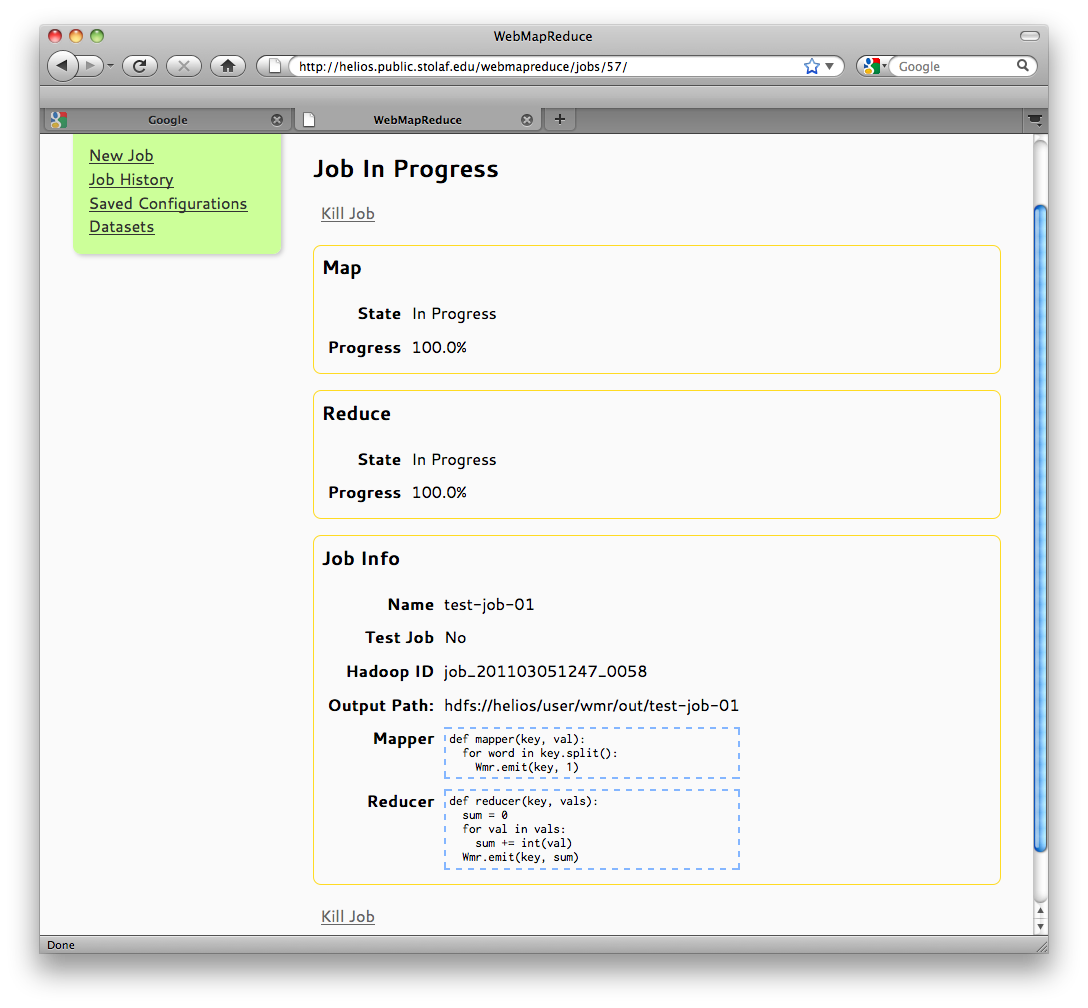
Job Status Screen
There can be a significant amount of overhead between the map phase and reduce phase of a map-reduce job, so there may be a period of time during which the mapper progress will be at 100%, and the reducer progress will remain at 0%. This is normal behavior, especially for small jobs, which may spend more time being distributed over the cluster than they spend actually running. Similarly, the mapper and reducer progress may remain at 100% while the output is being collected and the job finalized.
If the map-reduce system cannot run your reducer, the job will fail and you will be given an error message. If this happens, go back and try to debug your job using test jobs. If your job works when testing but fails on the cluster, contact your administrator.
Once the job is finished, the output is collected from the DFS and the user is given the option to use the output as the input for a new job. The output is displayed on-page, and is split into multiple pages if it exceeds a certain size.
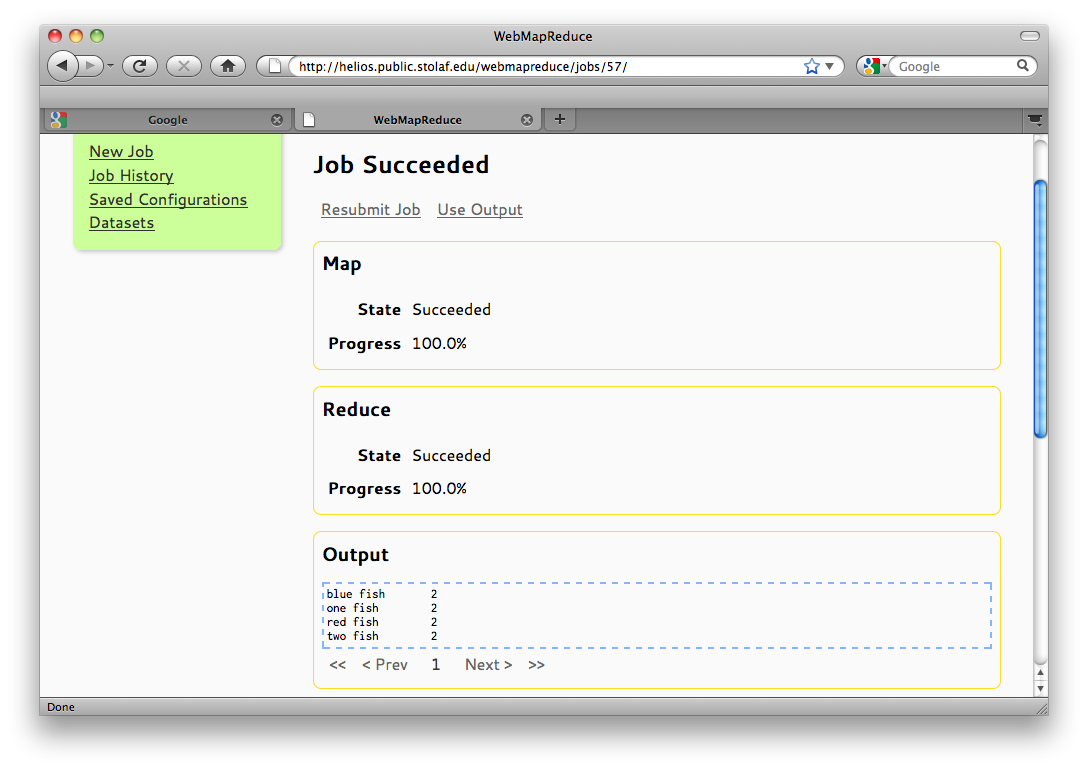
Status Page of a Completed Job
For any questions related to the use of WebMapReduce, please see the WMR help and discussion forum at:
https://sourceforge.net/apps/phpbb/webmapreduce
For documentation for each language, please see subsequent chapters of this User Guide.